MENU
Upgrades to my Heavy Duty CNC RouterRotate and pan around the 3D model for this project below!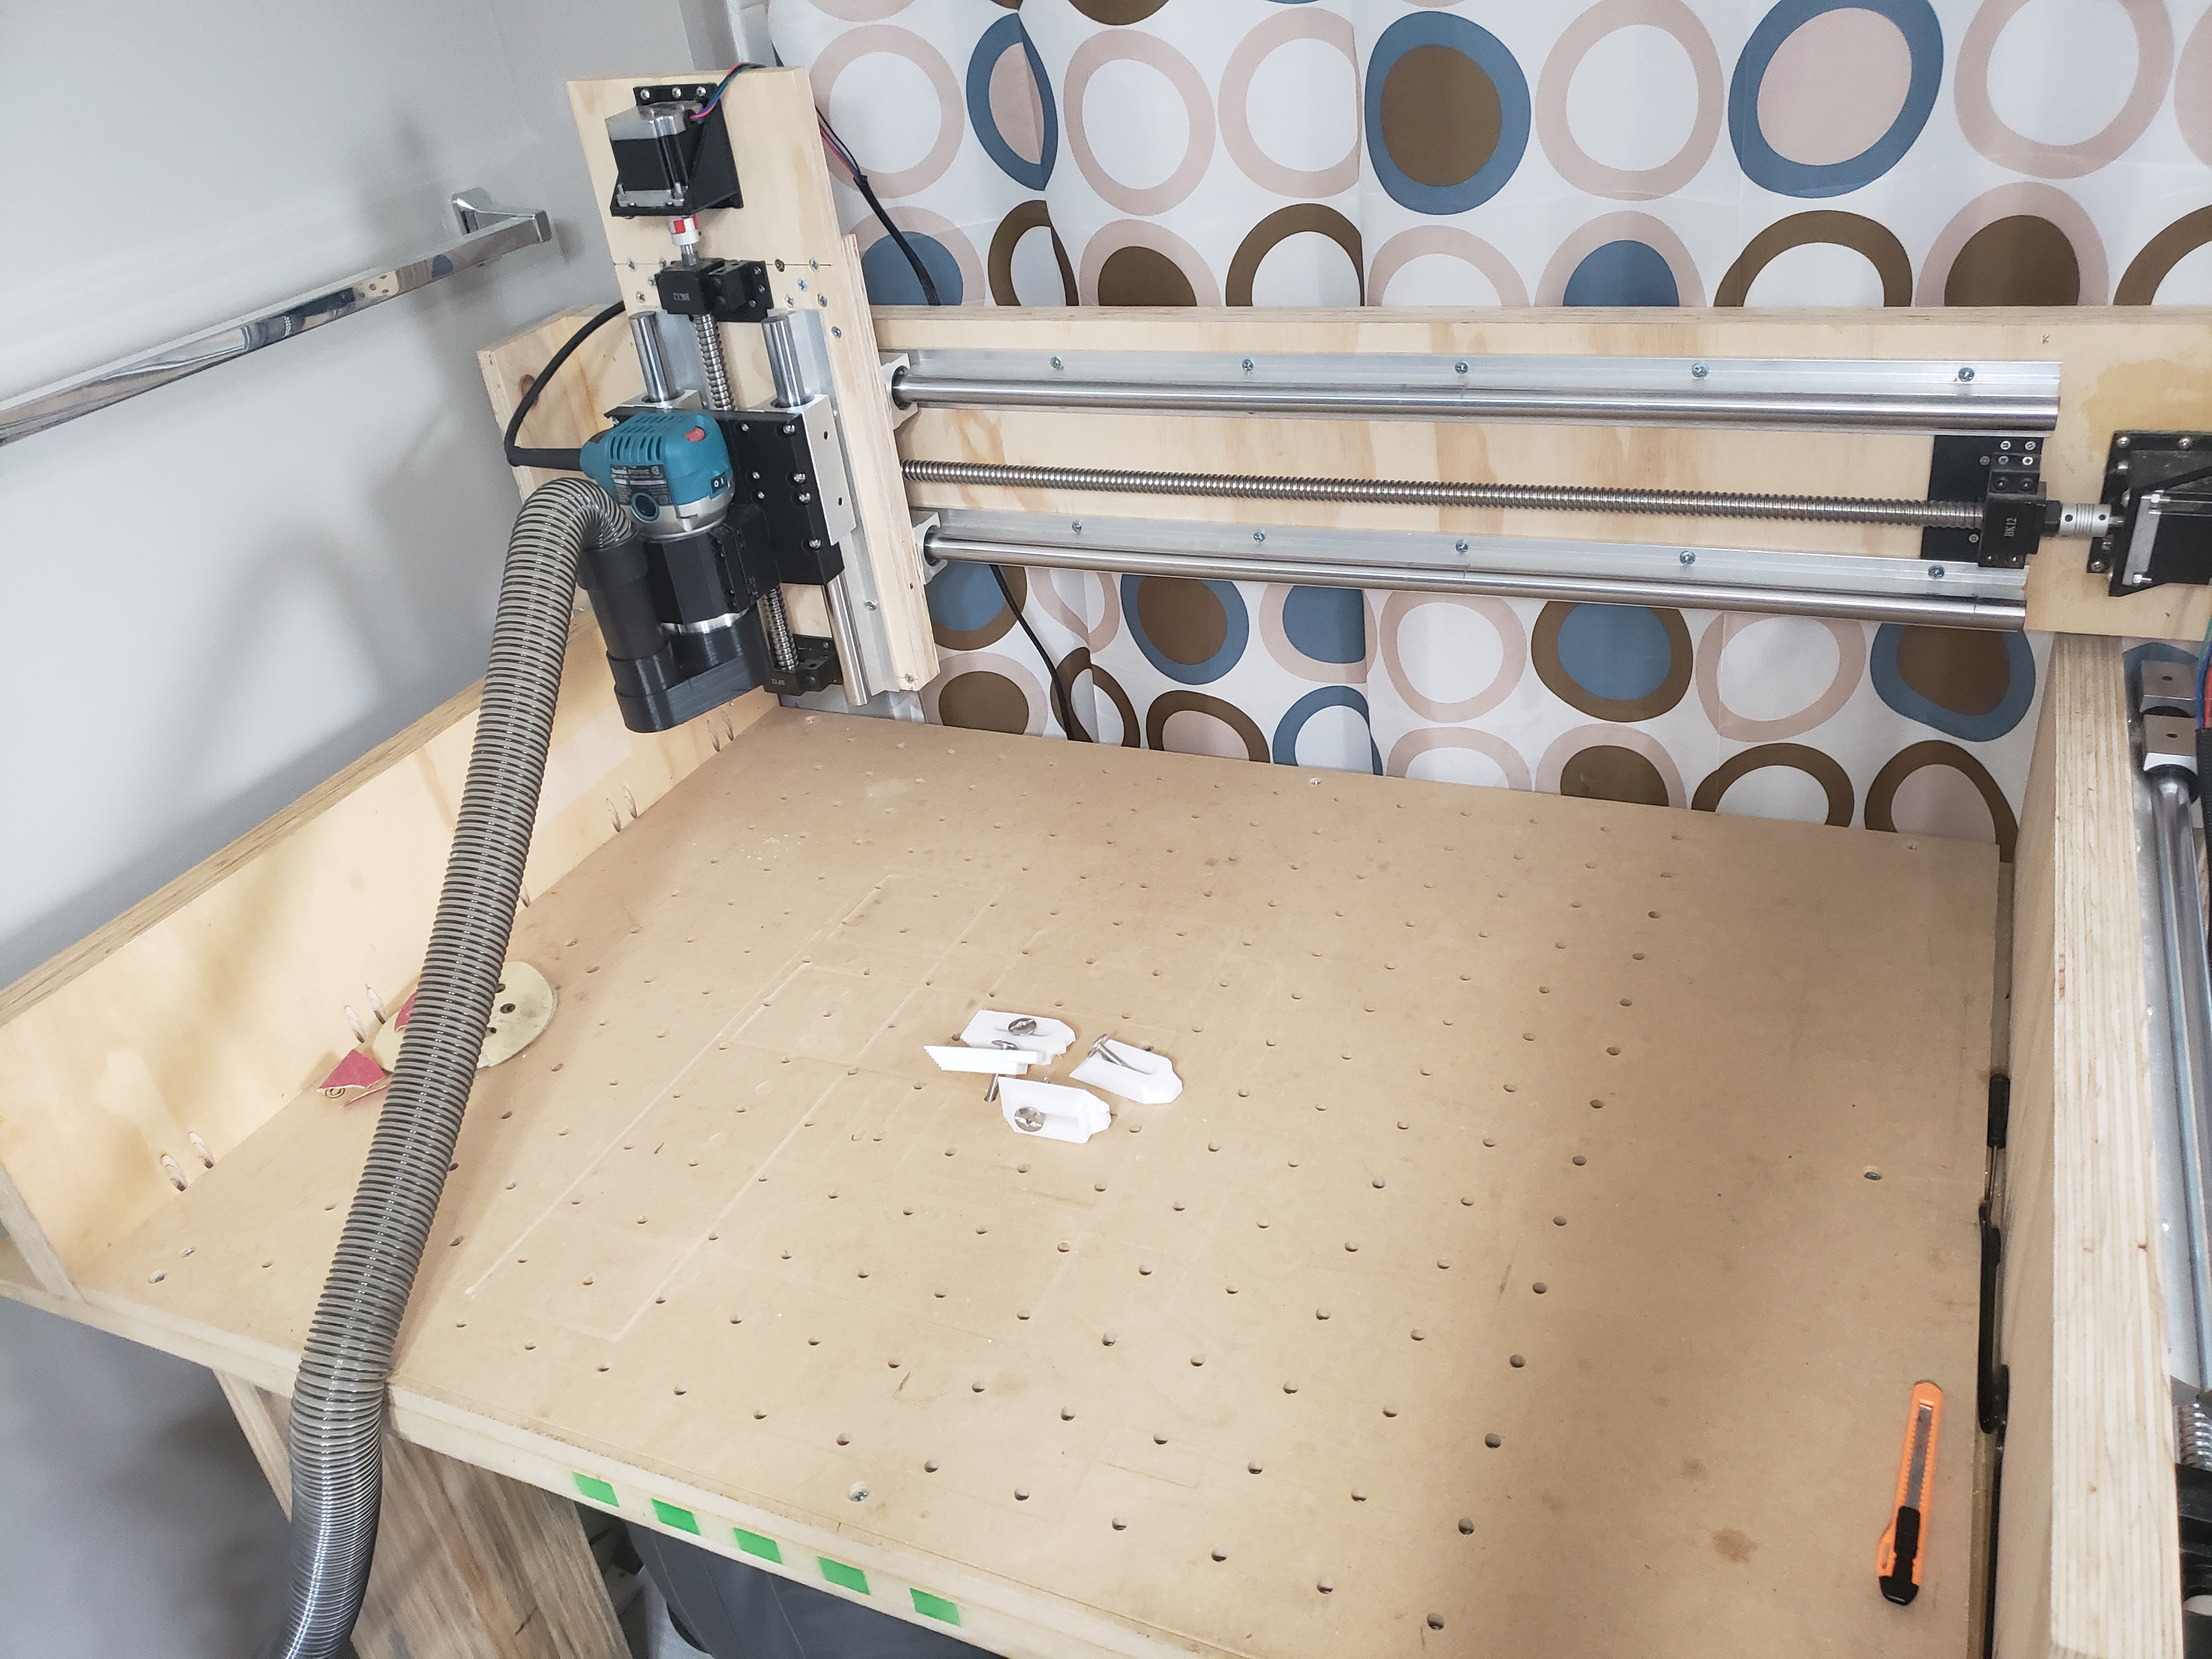
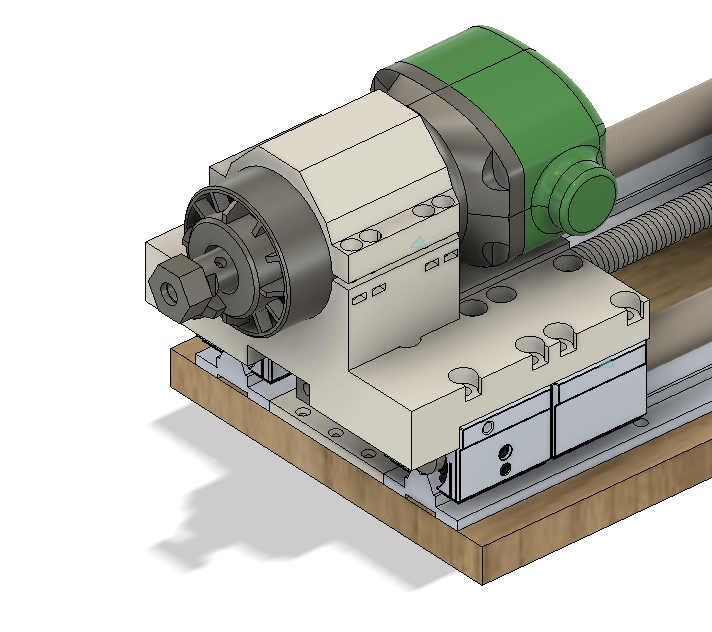
Once I had completed my bigger, upgraded CNC router, I immediately wanted to start making stuff, but as I carved some things out, I knew that there were some crucial upgrades that I would have to make before I could truly call this machine complete.The first one of these problems was workholding. As it was, there was no way to attach something to the CNC machine other than screwing it directly to the bottommost piece of MDF, and since that piece was a part of the machine, I really didn’t want to do that since eventually, it would compromise the structural rigidity of the machine. As a result, I ended up making a wasteboard on top of the previous MDF and adding threaded inserts into it to allow for workholding. I also ended up creating some simple clamps to 3D print that could be used in conjunction with the threaded wasteboard for workholding. Pictures of both are shown below.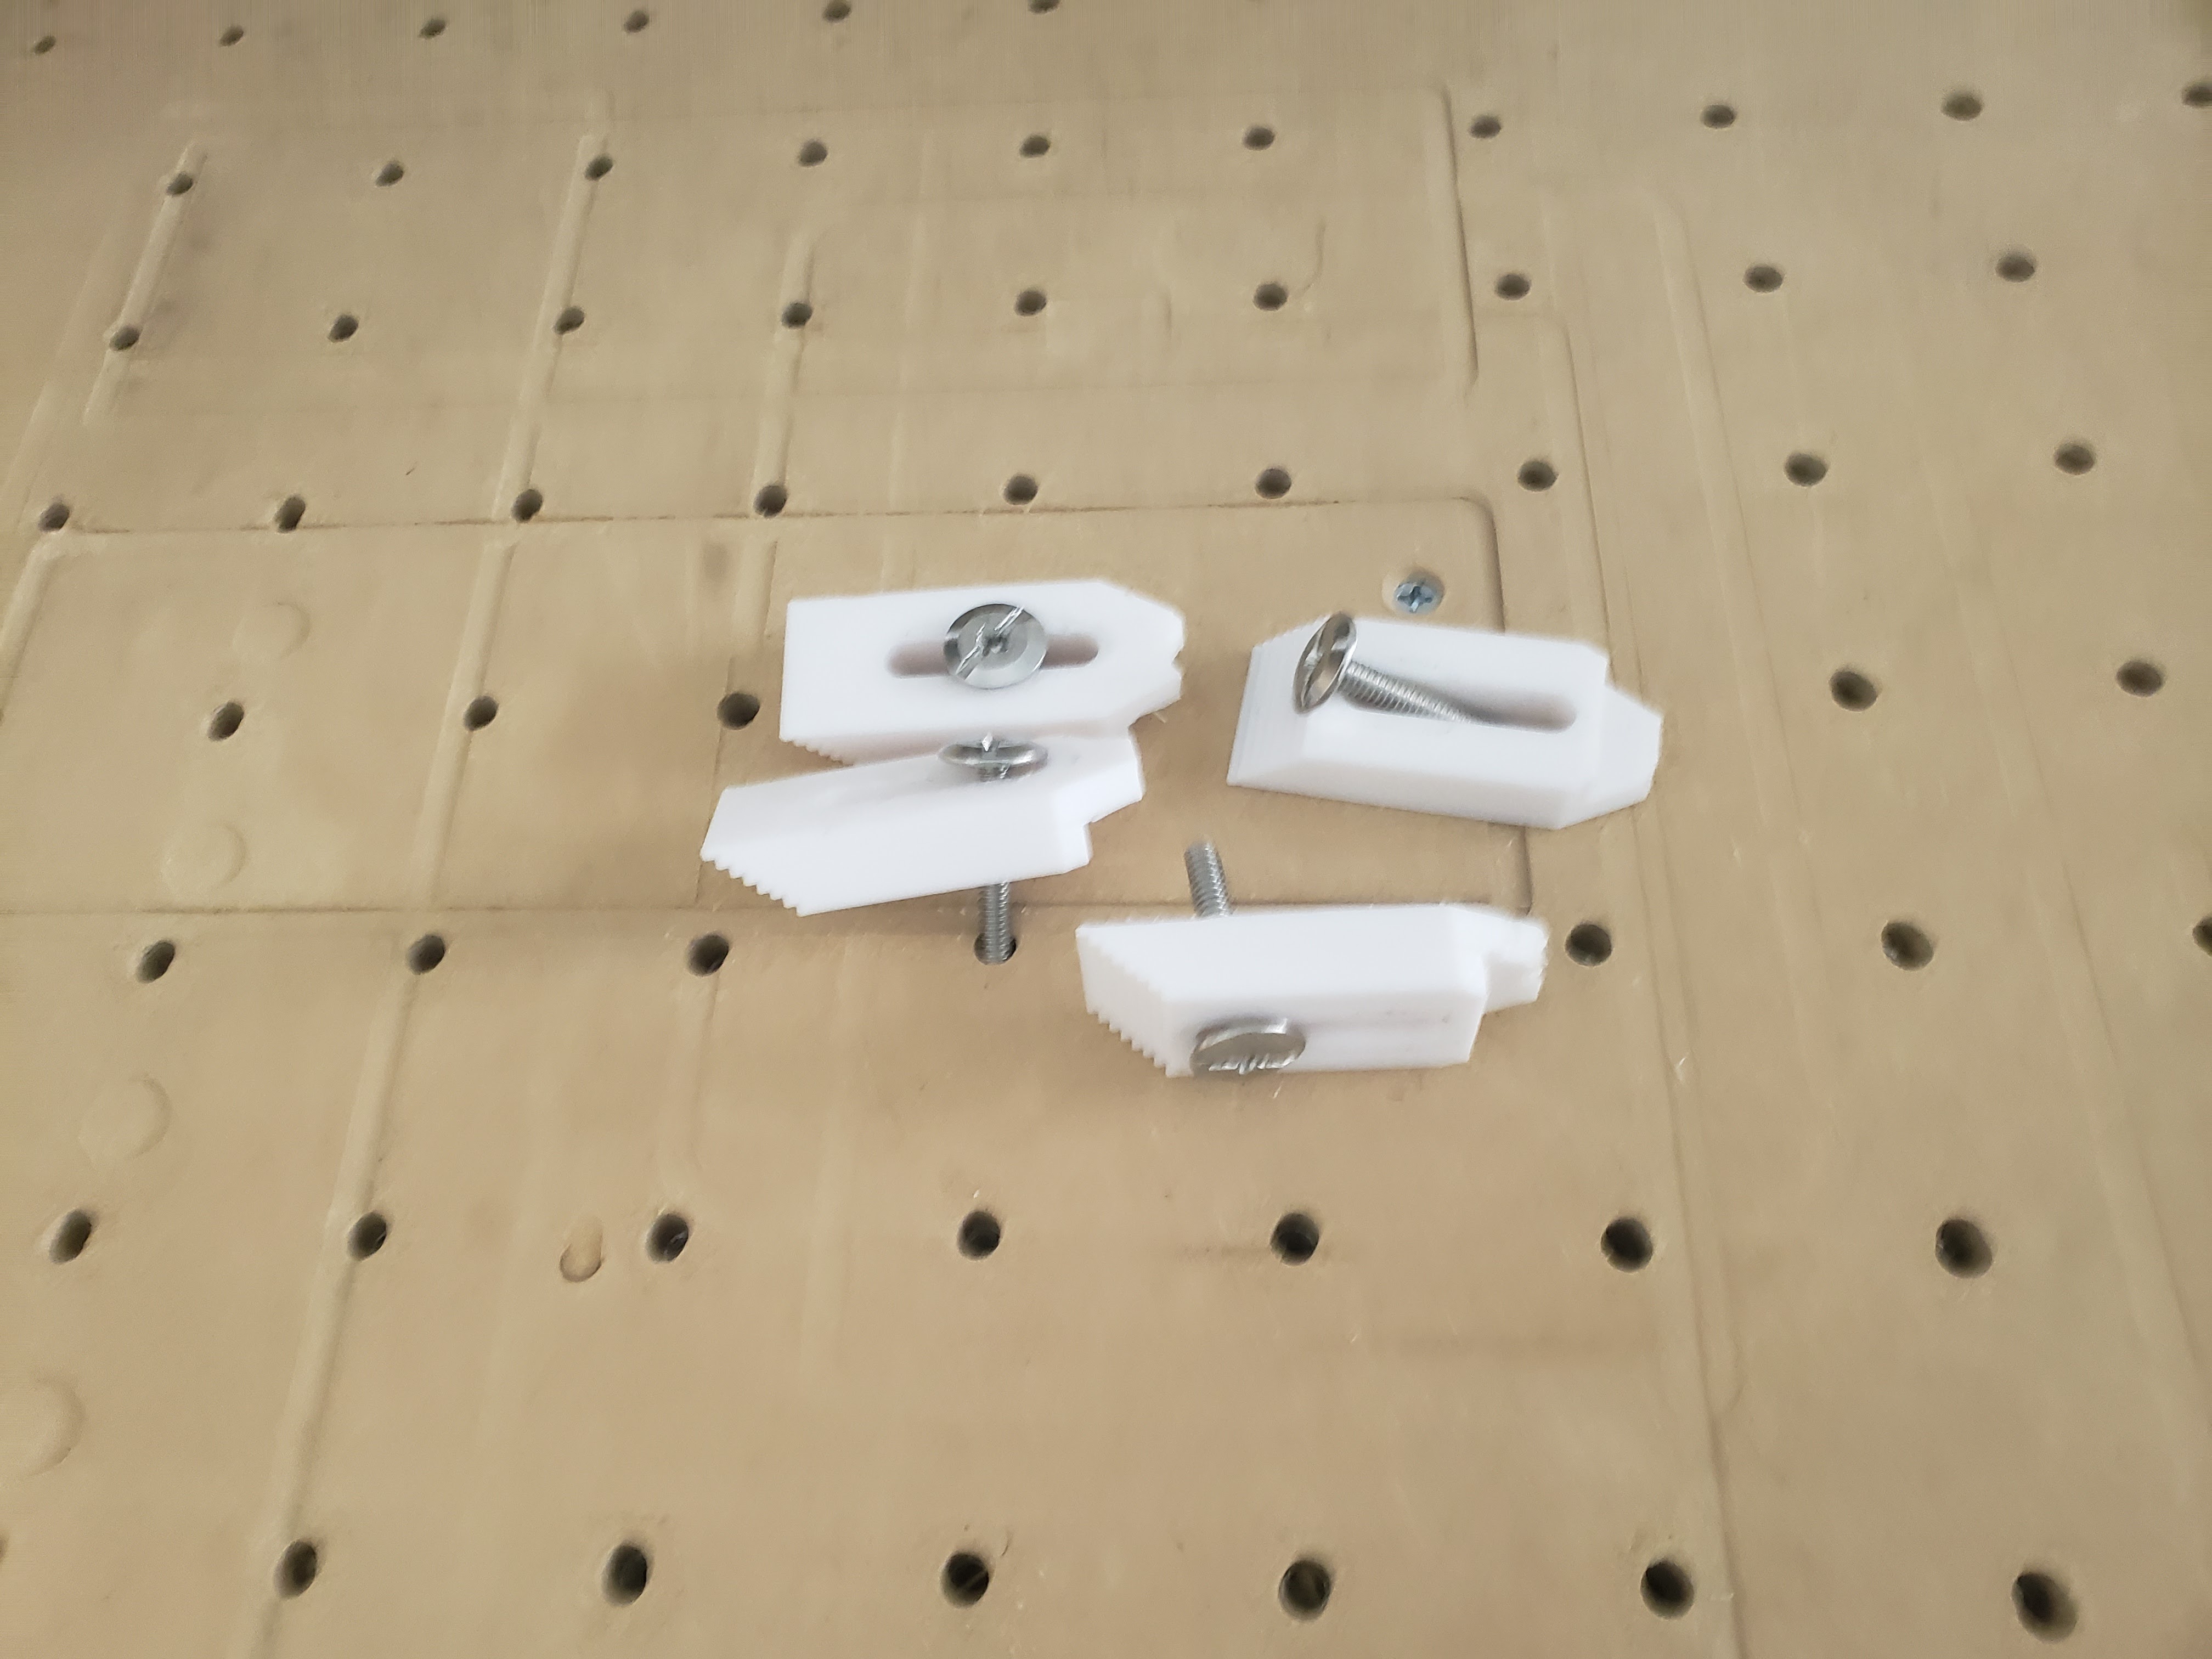 The next problem to solve was the problem of rigidity. While the entire motion assembly was quite rigid, the cuts were still more inconsistent than I would like and I couldn’t use the feeds and speeds of even machines like the X-Carve or the Shapeoko CNC machines, which is what I was aiming for. After some poking and prodding, I realized that most of the sway and inconsistency came from mostly the router and Z assembly as a whole.To fix this, I tightened the grub screws on the linear rails attaching the Z assembly to the Y axis and I also tightened the grub screws on the Z axis linear rails. I then redesigned the router mount to have much more contact area with the router, a tighter fit, more retaining screws, and a shim behind the router to prevent unwanted backwards router nod when plunging. While I was doing this, I also went ahead and 3D modeled and printed a dust shoe and printed the router mount as one piece rather than two. Pictures are shown below.
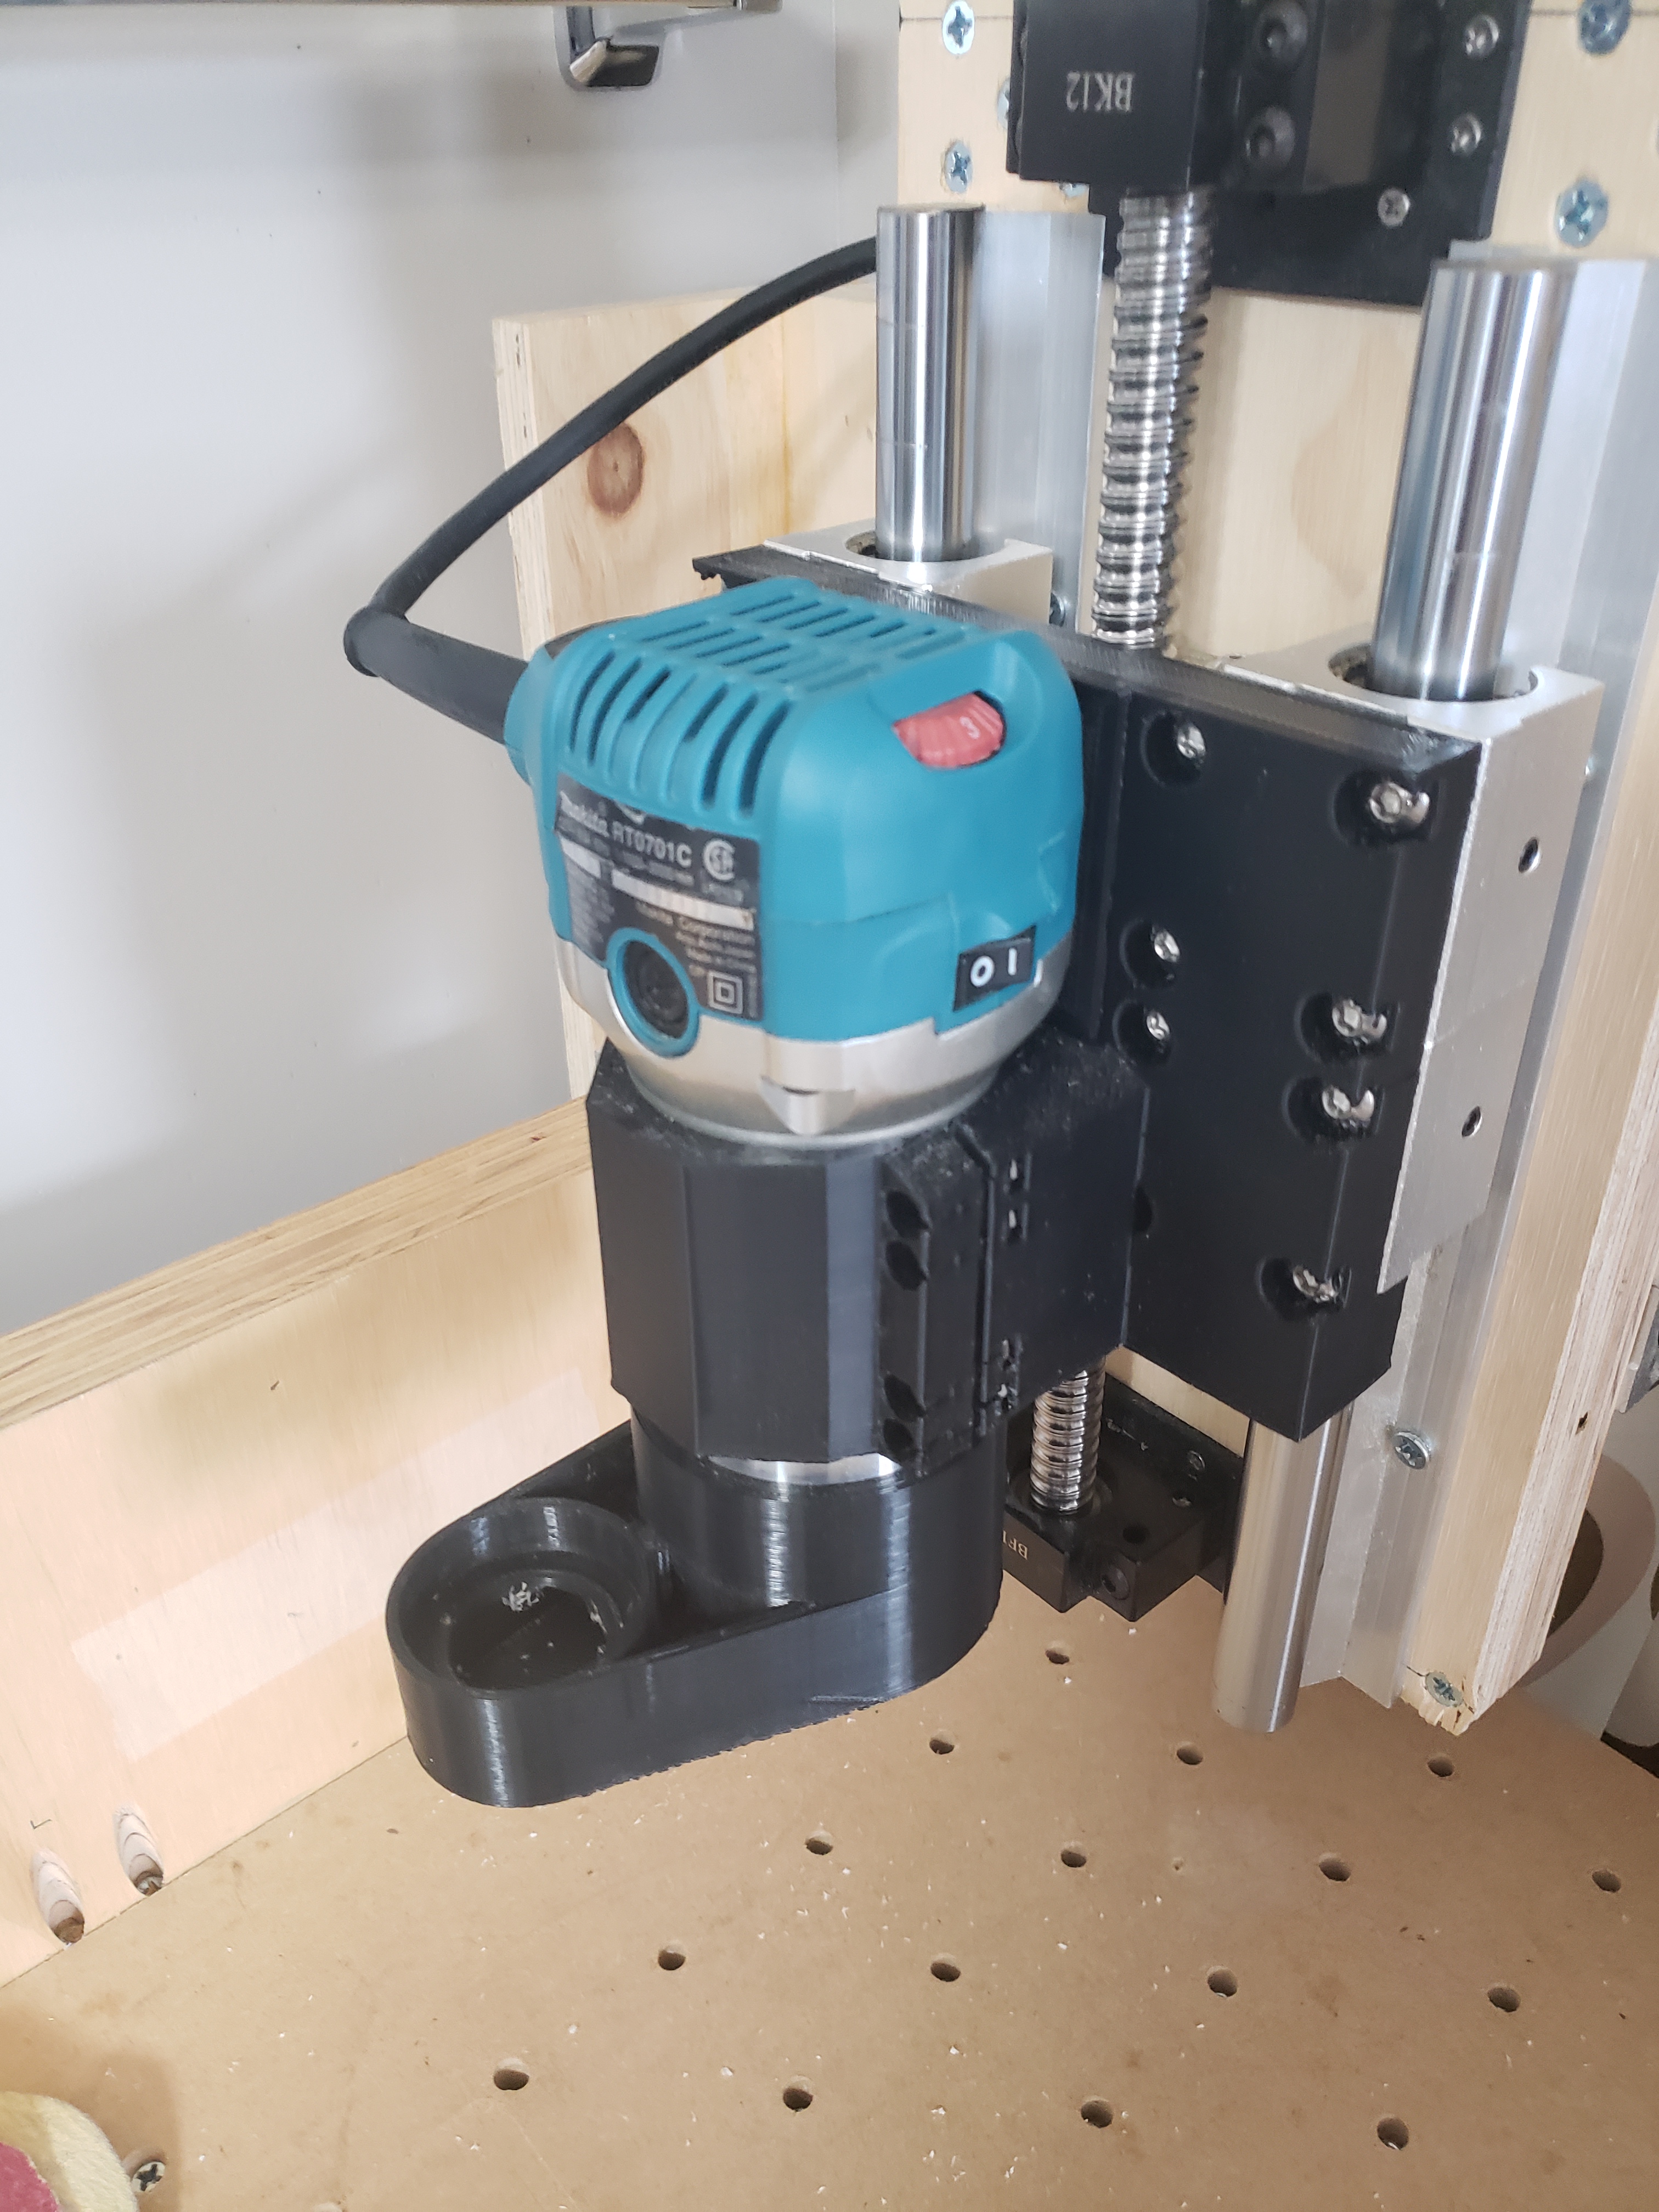
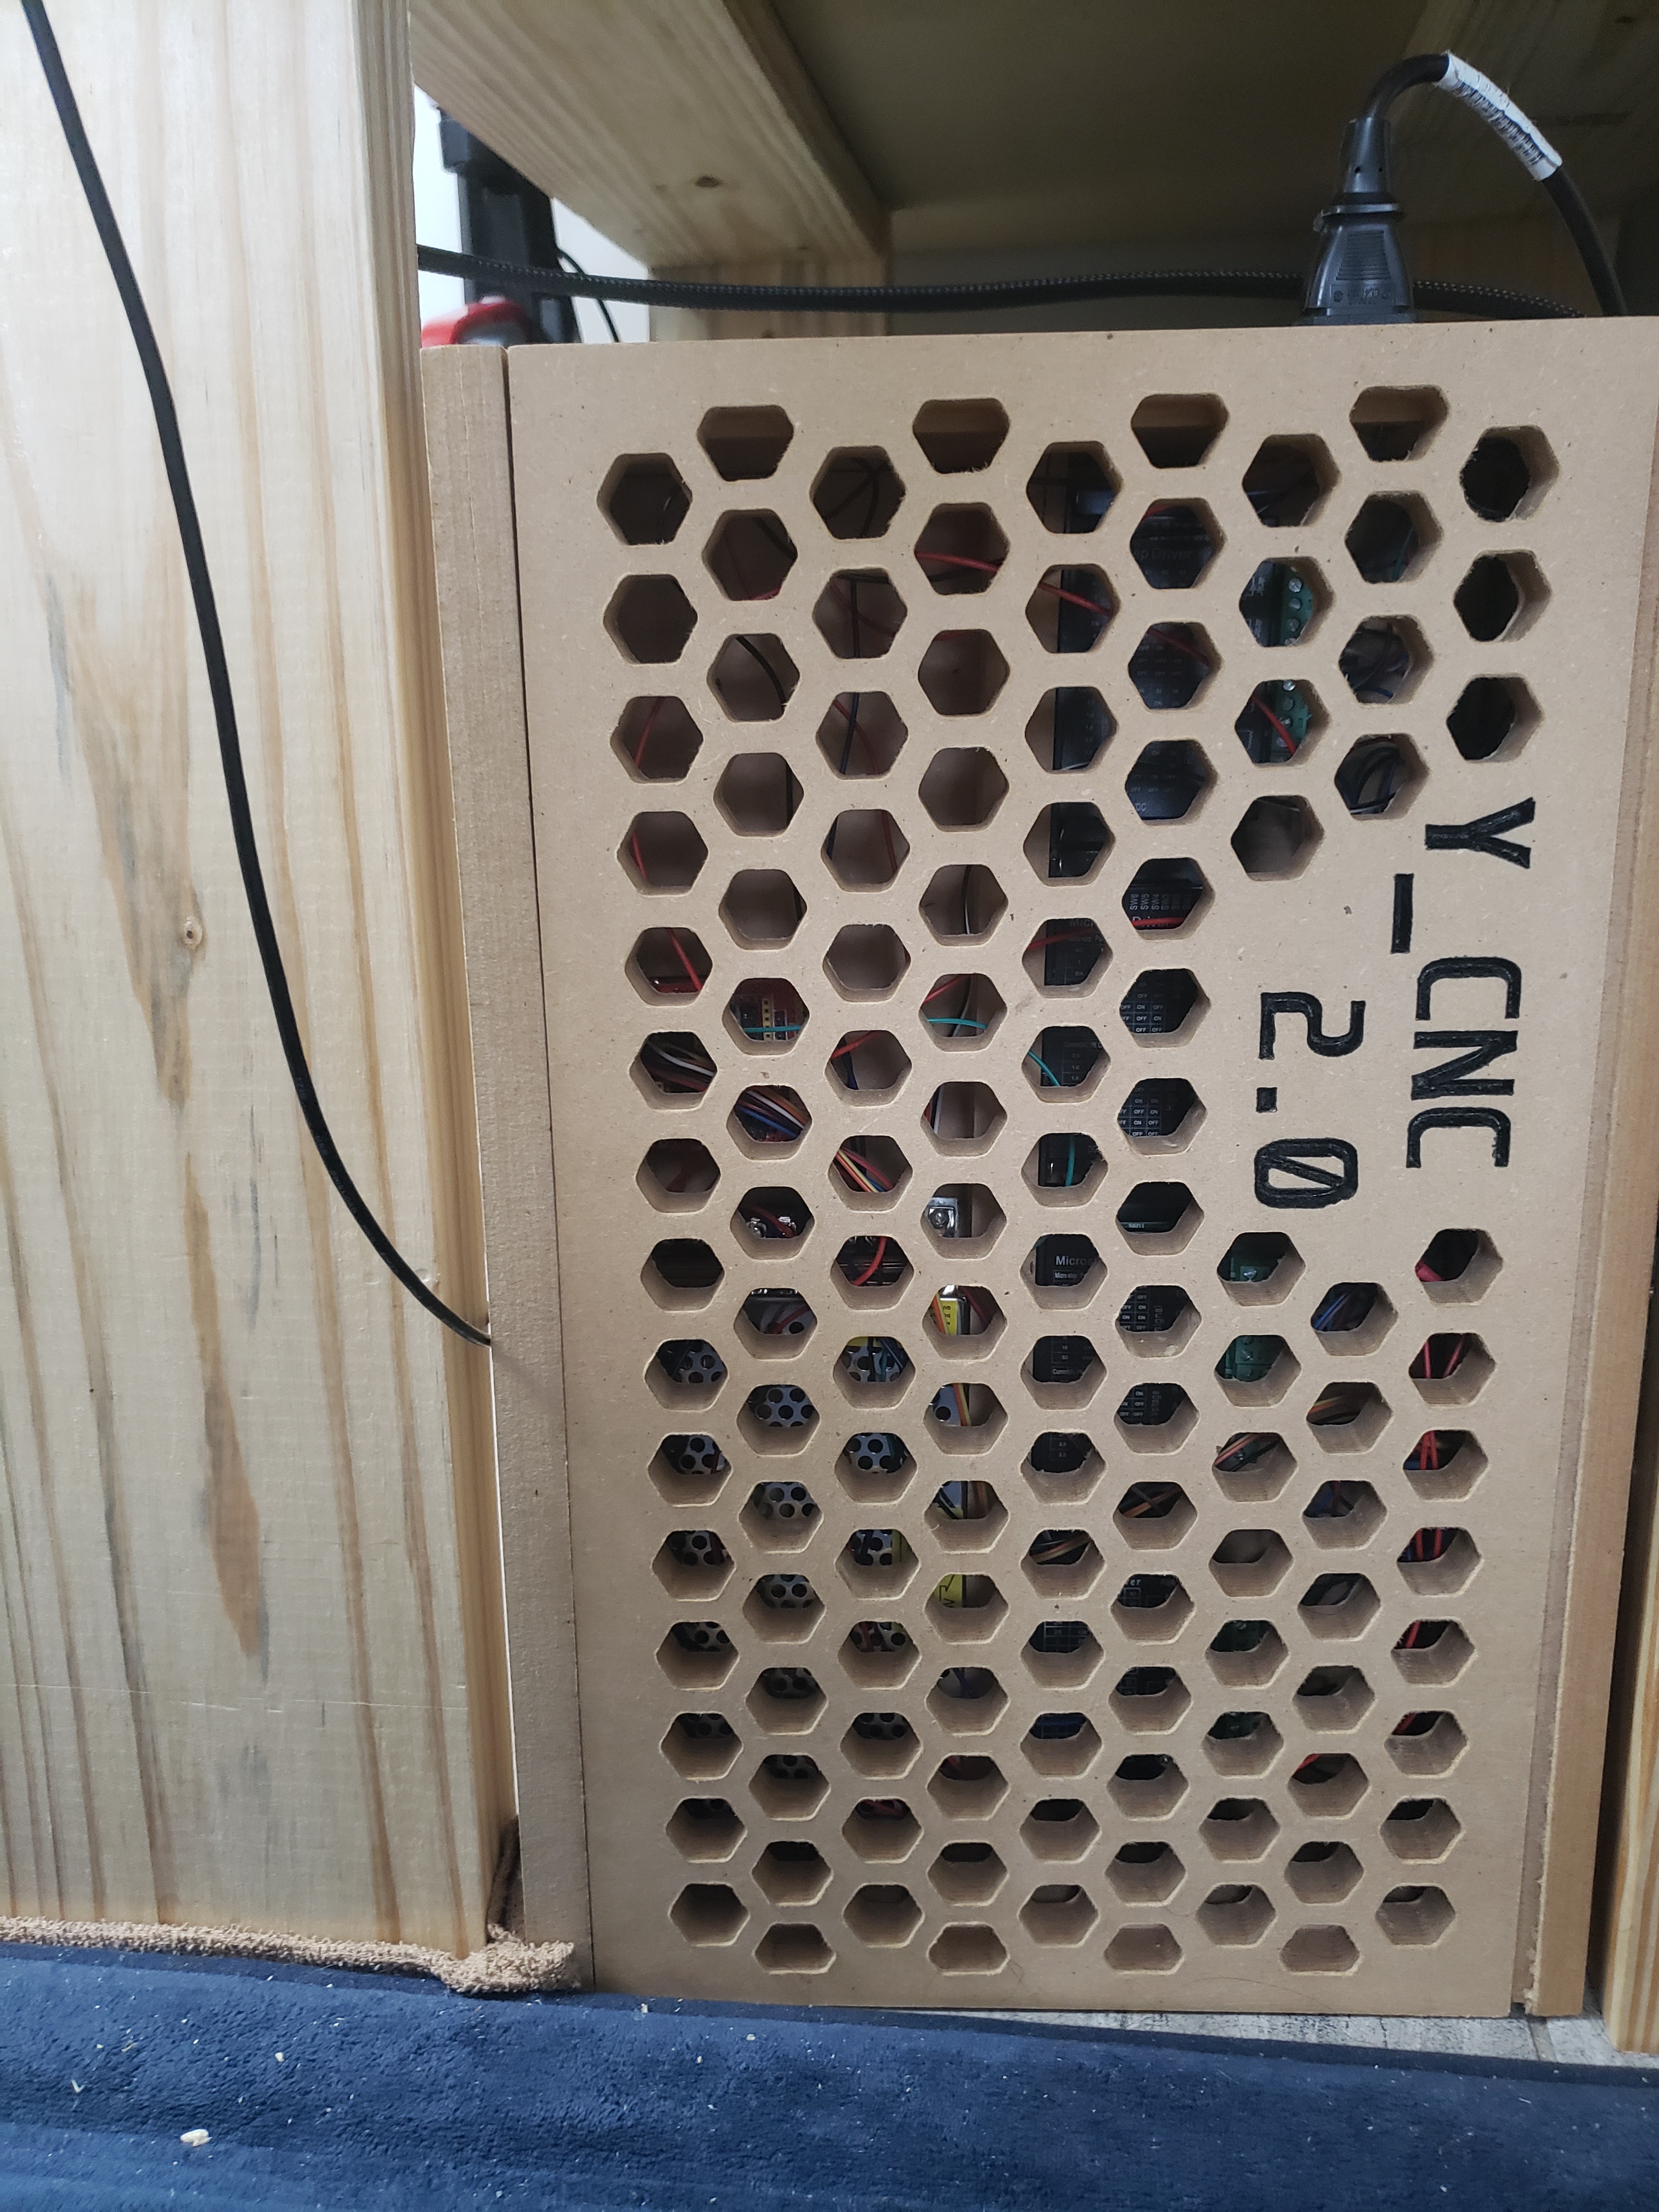
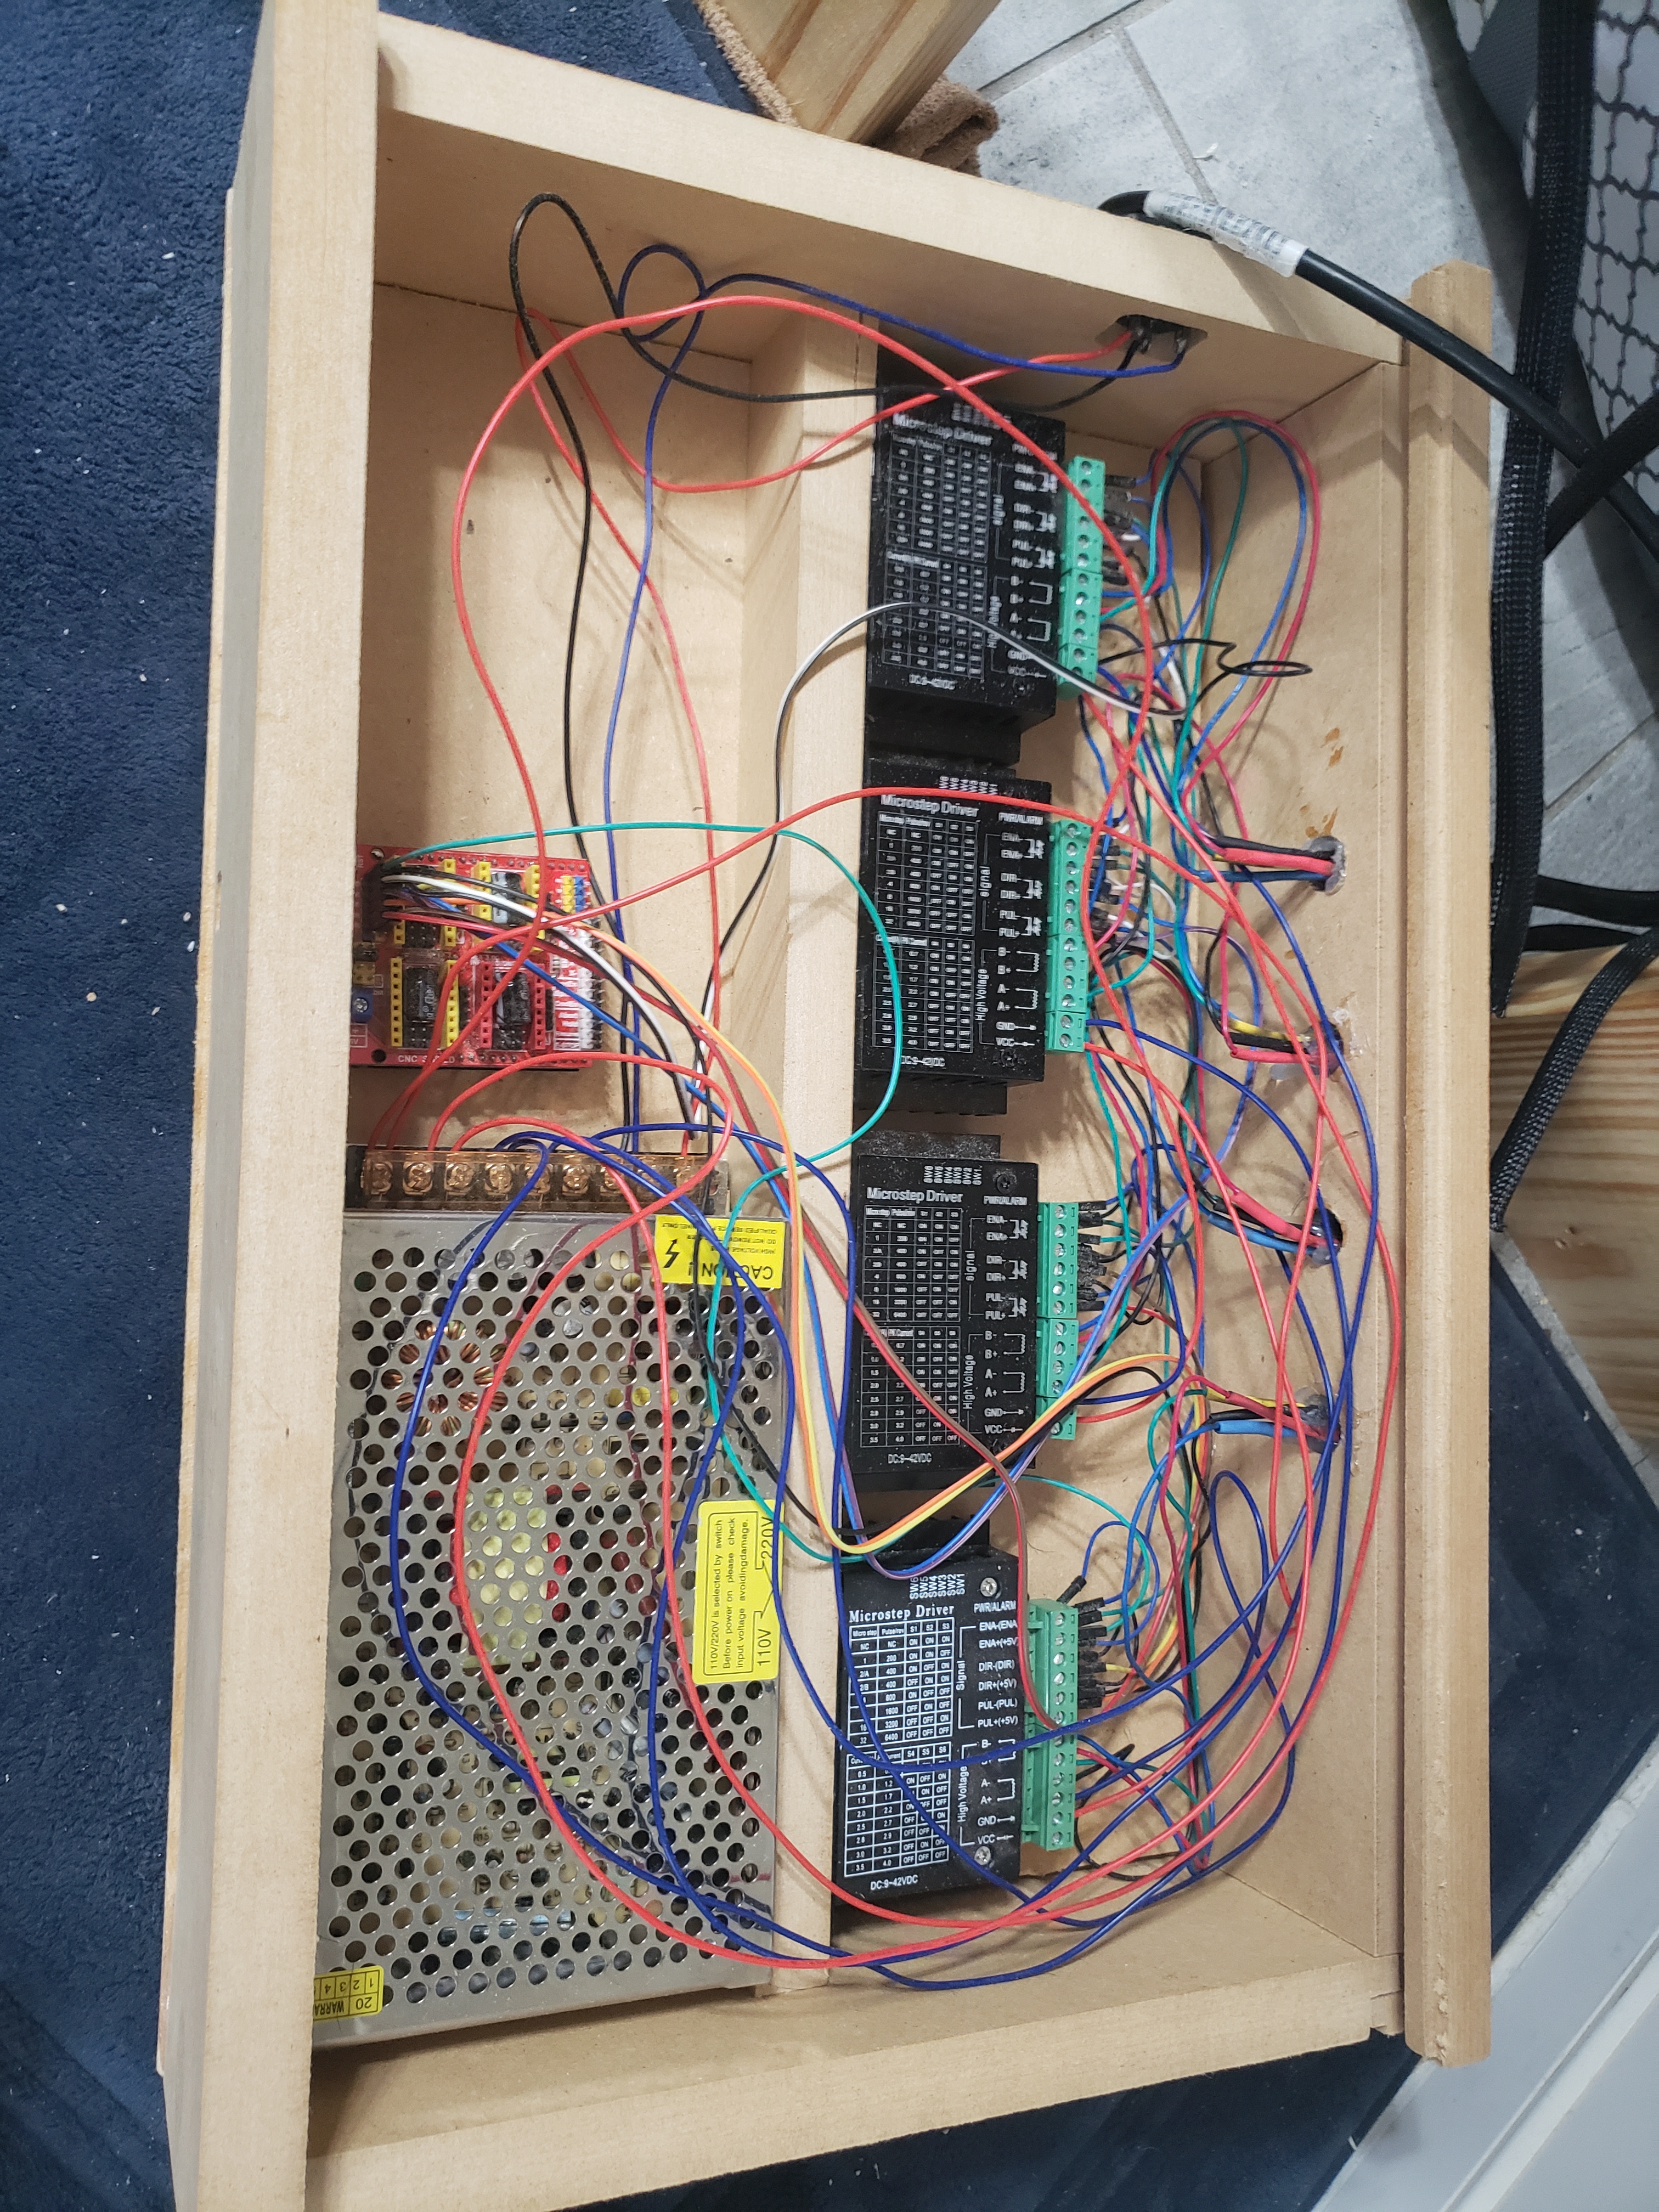
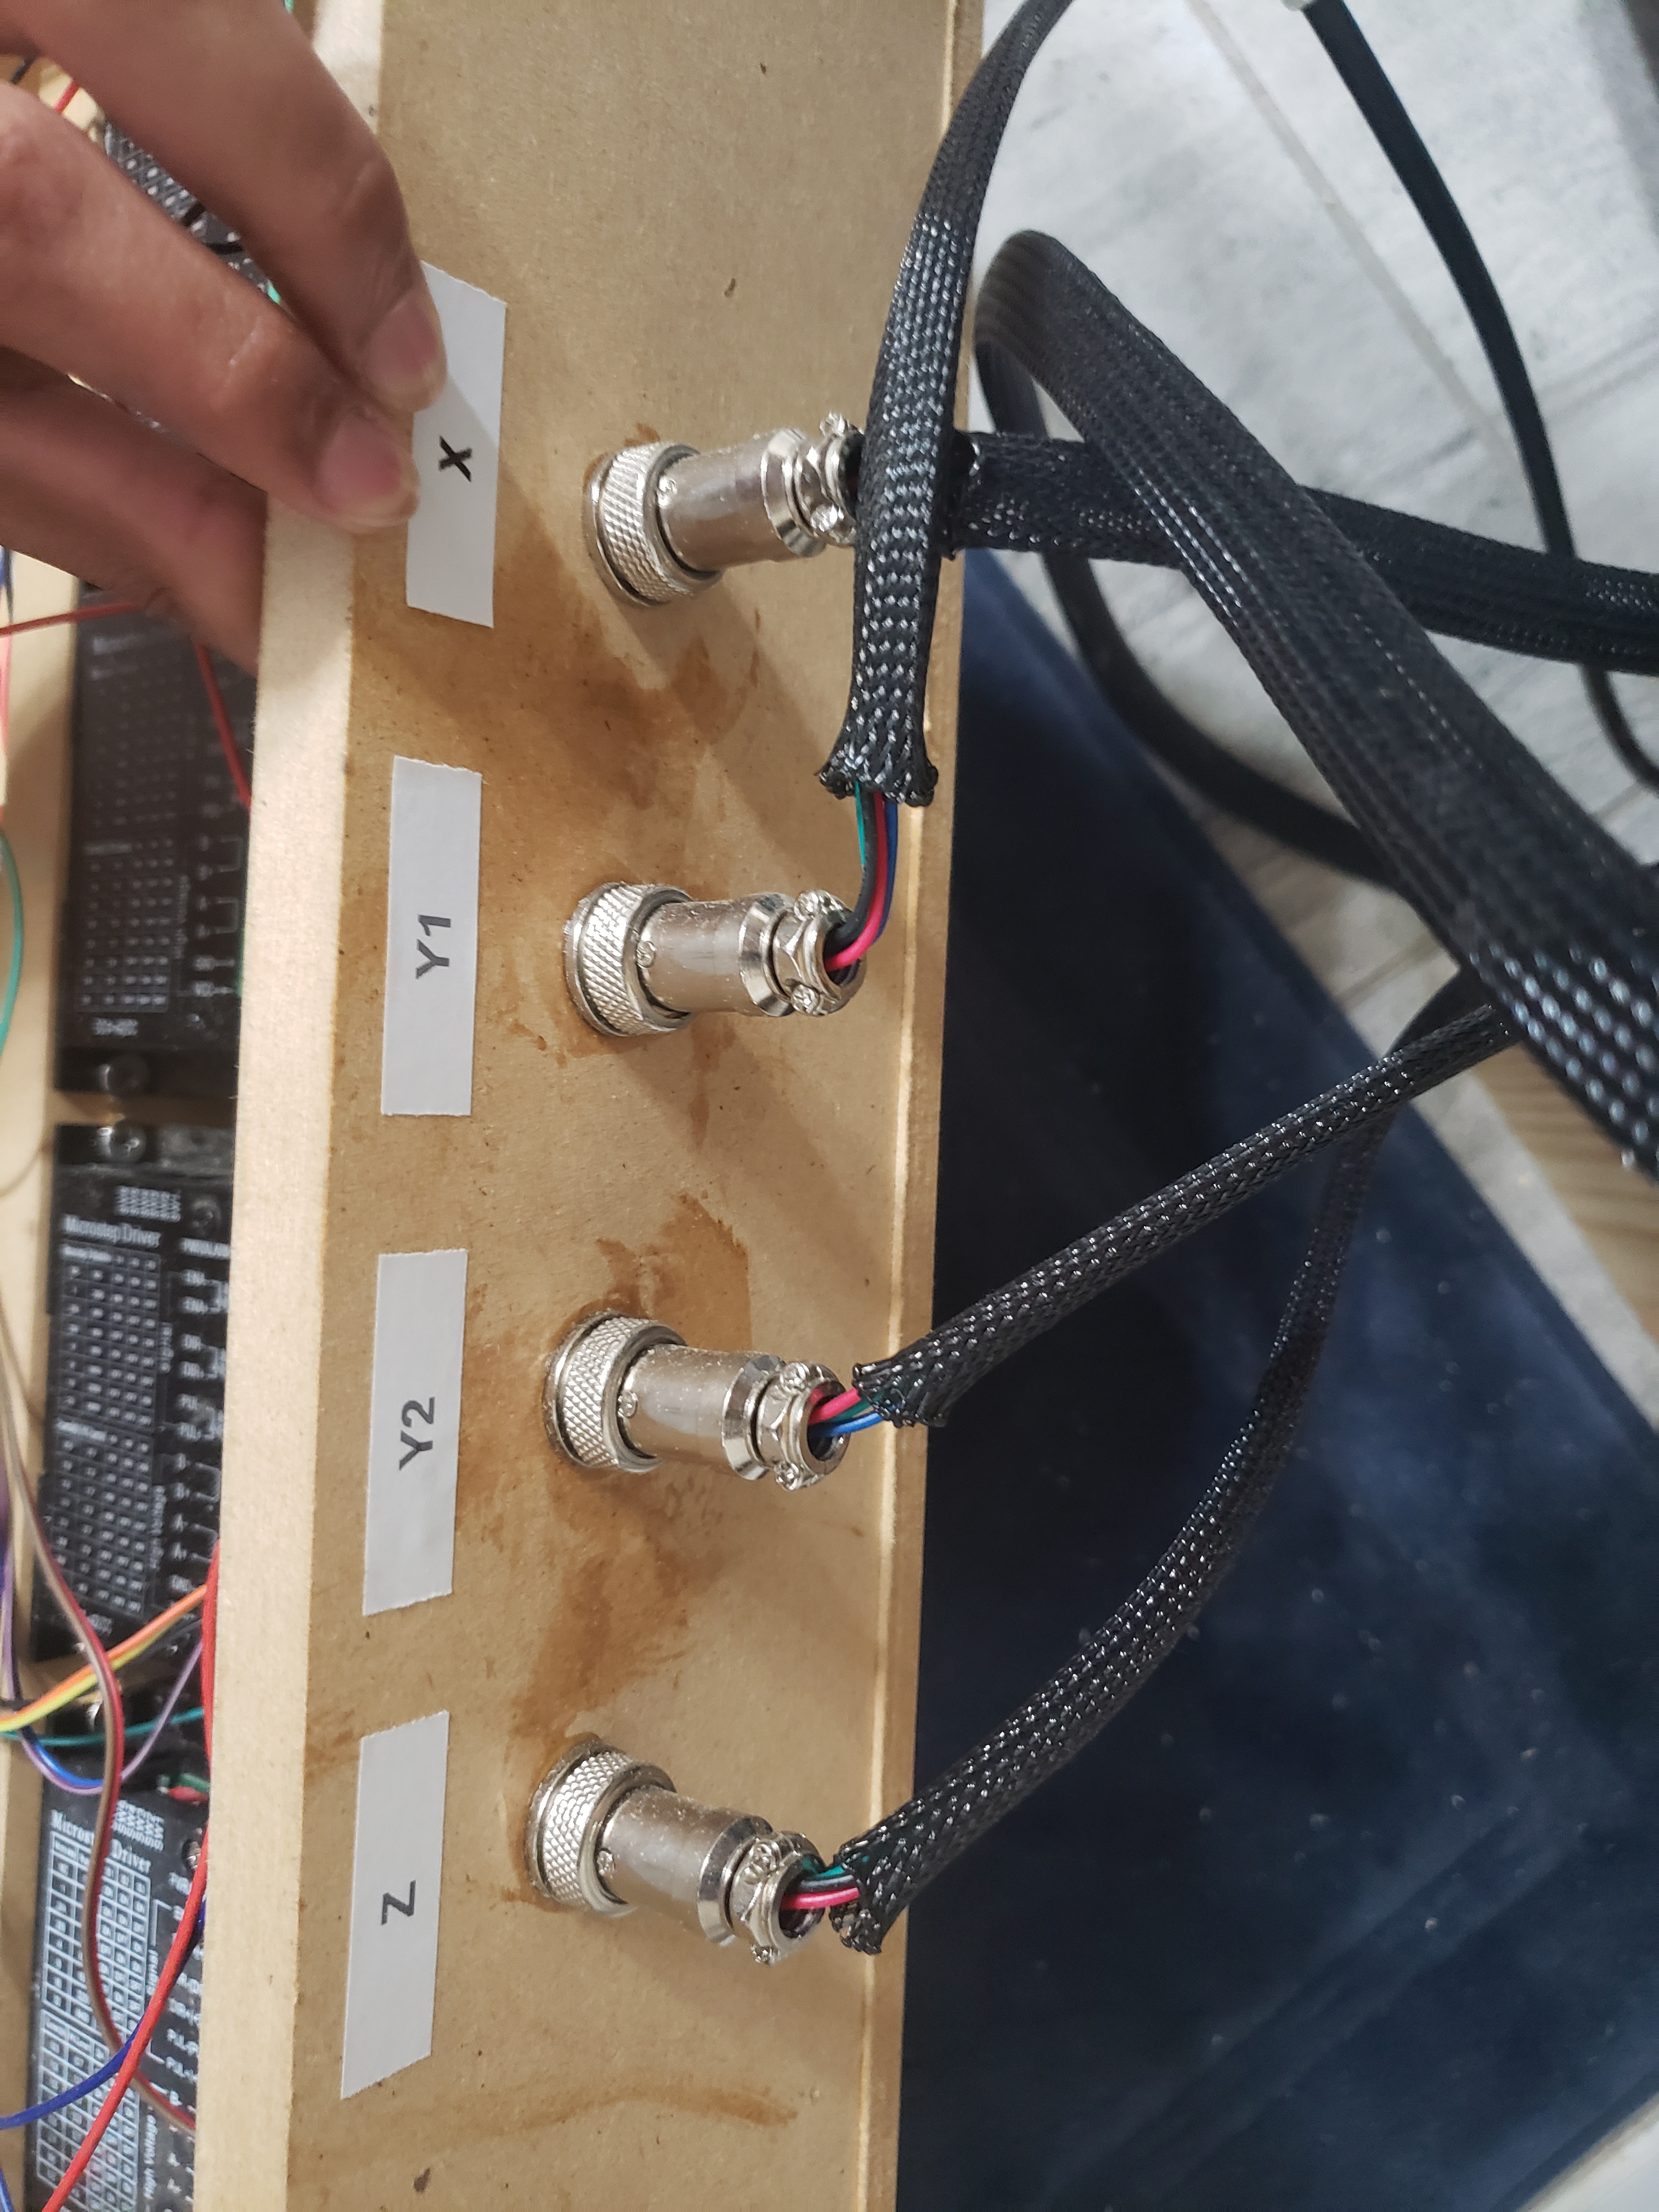
 The final issue that I had to fix is that of the electronics since I had not built an enclosure yet and the electronics to run this machine were just out in the open on a piece of wood, open to the elements. To fix this, I designed an enclosure that I could cut out with my CNC that would have enough space for the stepper drivers, Arduino and also space for expansion. I also wanted to be able to disconnect the electronics from the machine for easier transport, so I went ahead and used aviation connectors to make the stepper motors easy to disconnect. I also went ahead and modeled in a hexagonal pattern on the faceplate for airflow and aesthetics as well as the name of the machine. Photos of these are also shown below.